How to Disable Enforced Driver Signing

Posted on

For those having issues installing drivers that are not digitally signed, but still want to use the driver: here’s a way to disable enforced driver signing.

1. Go to Start | Run | Type gpedit.msc, and click OK

2. Go to User Configuration | Administrative Templates | System | Driver Installation

3. Select Code signing for device drivers | Properties | Enable | Ignore

Reboot, and you should be able to install those drivers with no more problems

How to Disable UAC

Posted on

User Account Control is a feature of Windows Vista that is a bit controversial. Mostly, as it pop’s up quite often asking for permission to do simple things. It can get quite annoying. Here are a couple ways to disable it.

Turn off UAC

User Account Control is a feature of Windows Vista that is a bit controversial. Mostly, as it pop’s up quite often asking for permission to do simple things. It can get quite annoying. Here are a couple ways to disable it.

First, is the easy way:

Click the Start Orb | Go to All Programs | Accessories | Run. In the run box, type “MSCONFIG” without the quotes.

Next, click on the “Tools” tab. Scroll down until you see “Diable UAC”. Select that option and press the “Launch” button.

Close the black command prompt box that opened and you are finished.

Second, the right way:

First, Go to Start | Control Panel | User Accounts

Next, click the “Turn user account control on or off” option. Click continue on the UAC box.

Now, uncheck the box next to “Use user account control (UAC) to help protect my computer” and click OK.

Restart your computer, and UAC is now disabled. To turn it back on, just do the same, but check the “Use user account control (UAC) to help protect my computer” box and click OK

Why Do I keep Getting a 0x80240029 Error with Windows Defender

Posted on

A Windows Defender 0x80240029 error says that “Windows Defender cannot download updates”. Here is a solution that may work for you:

1. Open Windows Updates by going to Start | All Programs | Windows Updates

2. In the left hand pane click on “Change Settings”.

3. Turn off Automatic Updates and uncheck “Check for Updates”.

4. Now, click “Check for Updates”. It should find some updates, as well as the Windows Defender update.

Disable Option To Install Updates on Shutdown

Posted on

Windows updates are a necessity and need to be done to keep a stable a secure system. But, there are times when you want to shut your computer down quickly, not having to “Install Updates and then shut down computer”. There are times when you don’t care, and do want to update. So, why doesn’t Windows give you the choice? Well, follow these steps and it will finally give you the choice.

1. Open regedit (Start > type regedit and press enter).

2. Browse to HKEY_LOCAL_MACHINESoftwarePoliciesMicrosoftWindowsWindowsUpdateAU. If it doesn’t exist, you can right click and create a new key (I had to create both the WindowsUpdate and the AU key).

3. Create a new DWORD (32-Bit), with the name NoAUAsDefaultShutdownOption and modify its value to “1“.

4. Now you will have the regular Shutdown button as well as the Install Updates and Shut Down button. Some users like to have this control over their PC, and this gives it to you.

Set up a dialup connection in Windows

Posted on

To setup a Vista dialup connection is very similar to XP. But, to find where to get started is different. Also, the command “inetwiz” has been removed from the OS.

First, you can go into the Control Panel, then Network and Sharing Center. On the left side panel, select “Setup a Connection or Network”.

Select “Setup a dial-up connection” and click “Next”

Enter the local telephone number to dial into your ISP. Then, enter your user name and password. If you think you made a mistake on the password, you can click “Show characters” to see the password in plain text. If you don’t want to type the password everytime you want to connect, check “Remember this password”. You can name the connection if you want, as well.

Finally, if you have multiple accounts on the machine, you can select “Allow other people to use this connection”. Click “Create”

The next window will show that your internet connection is ready to use!

Completely Remove Printer Drivers

Posted on

Many times, you will buy a printer and need to update the drivers. Or you go somewhere and need to install a printer temporarily. Well, after you are done using that printer, the old driver sticks around, or pieces of the older driver are still there. Even when you delete the printer from the Device Manager, the driver still remains.

To remove the driver completely, you can follow these few steps using a built in Microsoft utility called MMC (Microsoft Management Console).

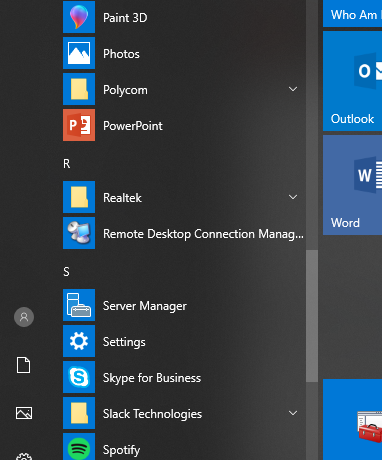
1. Go to the Start Menu and type MMC. You will see the MMC icon at the top of the search results. Click that to start the MMC.

2. Select File, then click Add/Remove Snap-in…

3. In the left pane, select “Print Management” and click Add.

4. Select “Add the Local Server”, click finish, then Ok.

5. Navigate to Print Servers, your computer name, Drivers. On the center pane, you should see the printers that were installed. Right click the printer driver you don’t want anymore, and select “Remove Driver Package”.

6. Reboot your machine and the driver is completely gone. This has also been know to solve some OS crashes in some situations.

Disable Safe Mode

Posted on

For some reason, if you decide you don’t want users to use Safe Mode, here is a way to disable access.

1. Open the Registry Editor (Start > Type regedit and press enter.

2. Navigate to HKEY_LOCAL_MACHINESYSTEMCurrentControlSetControlSafeBoot.

3. Rename the Minimal and Network subkeys to Minimal.old and Network.old.

4. Reboot, and you will not be able to access Safe Mode by pressing F8

Enable Built-in Administrator Account

Posted on

With the invention of Microsoft’s UAC (User Account Control), users were no longer Administrator. At least, not the full blown administrator. Windows now operates on the more secure least needed privledges. If you’d like to enable the built-in Administrator account, which is hidden by default, follow these few easy steps.

1. Open a Command prompt. You can go to Start and type CMD and press enter.

2. Type net user administrator /active:yes.

3. This will activate your Administrator account. To verify that it has indeed done just that, go to the Control Panel > User Accounts. You should see the Administrator account enabled and ready for use.

Reassociate ZIP with Windows

Posted on

Sometimes, a program associates itself with a compressed file, ZIP, and it opens with a lot of jibberish. It can be a pain, as the normal file association technique doesn’t work right.

Here is how to get Windows to open your ZIP files again:

1. Open a command prompt as Administrator. Start > Accessories > Right click Command Prompt and select Run as Administrator.

2. Type: assoc .zip=CompressedFolder and press Enter.

That’s it. Your zip files are now able to open with Windows.